Guides for SE student projects »
Java 25 Installation Guide for Windows Users
This guide explains how to install the Oracle Java 25 on Windows.
Installation
Download JDK
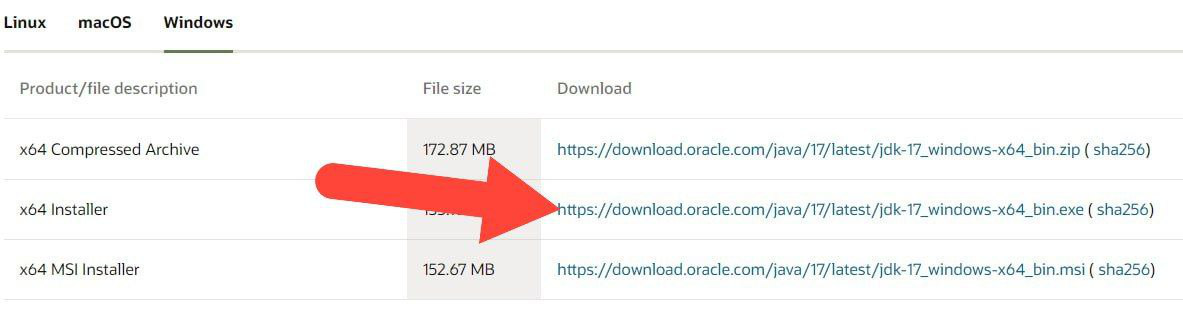
- Go to the Oracle download site here.
- Choose JDK 25 → Windows.
- Download the x64 Installer:
Install JDK
- Run the downloaded installer and follow the instructions to complete the installation.
- Suppose the JDK was installed in the directory
C:\Program Files\Java\jdk-25(this is the default location for Oracle, please check the installation directory within the installer for other distributors).
Verify installation by running the
java -versioncommand in your terminal (e.g. Command Prompt, PowerShell).Windows users: You might need to close and reopen the terminal for it to recognize changes done elsewhere in the computer (e.g., newly-installed software, changed to system variables, etc.)
Switching between Java versions
If you have multiple versions of Java installed, you can switch between them by editing the system environment variables. This involves updating the Path settings to point to your desired JDK version.
To see the currently active Java version run the following command in a terminal window,
java -versionTo switch to a different installed version,
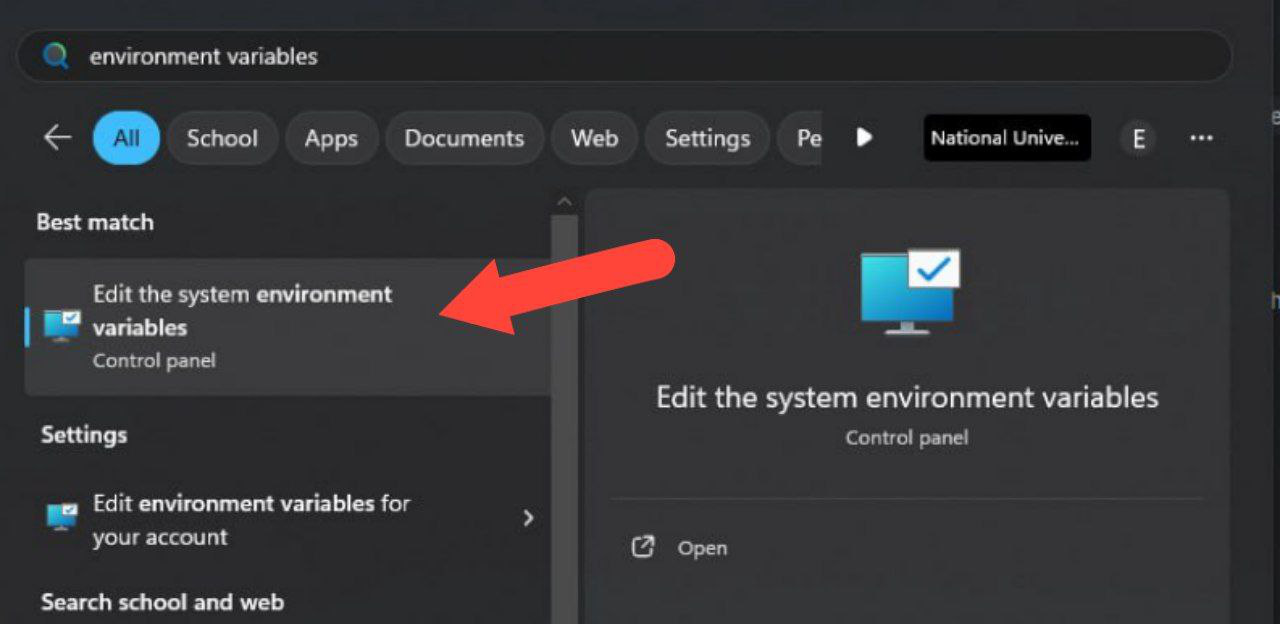
- Open the Start Menu by clicking the
Startbutton on your taskbar or pressing the key on your keyboard. - Type
environment variablesin the search bar and clickEdit the system environment variablesfrom the search results:
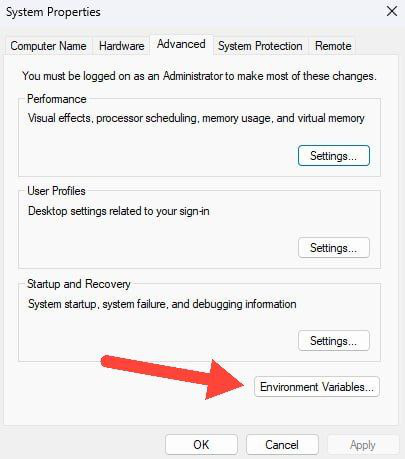
- In the window that opens, click on the
Environment Variablesbutton located near the bottom:
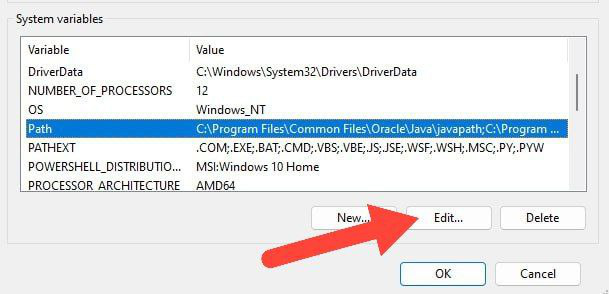
- Scroll through the "System variables" section to find the
Pathvariable, select it and clickEdit.
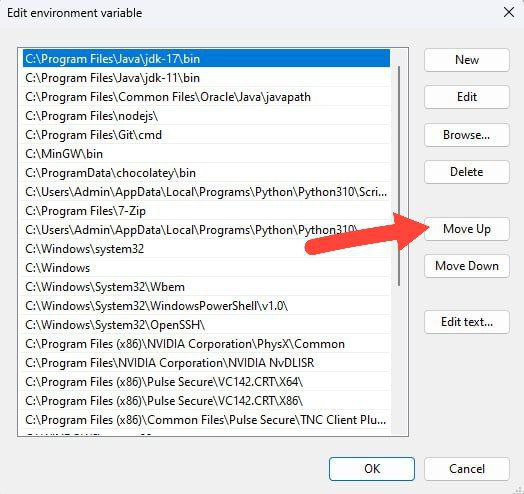
- In the
Edit Environment Variablewindow, you will see a list of paths. These paths represent directories your system searches to find executables like Java.- To prioritize a different Java version: Find the path to your desired Java installation (e.g.,
C:\Program Files\Java\jdk-25\bin) and move it to the top of the list.
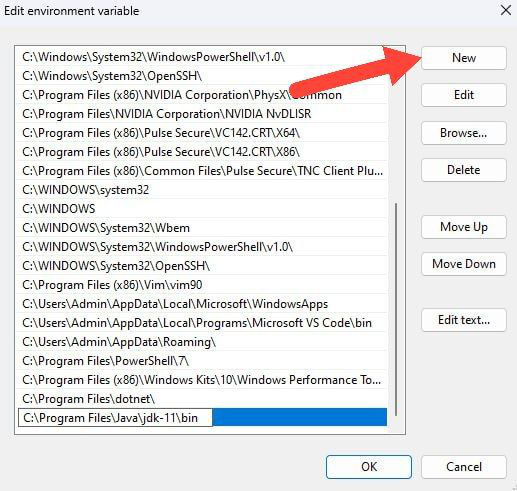
- To add a new Java version: Click "New" and add the path to the bin folder of the Java version you want to use (e.g.,
C:\Program Files\Java\jdk-11\bin).
- To prioritize a different Java version: Find the path to your desired Java installation (e.g.,
- Click OK on both
Edit Environment Variableand "Environment Variables" windows to save your changes and close the windows.
- Open the Start Menu by clicking the
Verify the version change by running the
java -versioncommand in a new terminal window:Windows users: You might need to close and reopen the terminal for it to recognize changes done elsewhere in the computer (e.g., newly-installed software, changed to system variables, etc.)
If you already have a
JAVA_HOMEsystem variable defined earlier, you need to update it to point to the JDK of your choice. The procedure is similar to how you changed thePathvariable.
Authors:
- Initial Version: Ryan Chiang (@macareonie), Yong Jun Xi (@TobyCyan)