Guides for SE student projects »
Using Checkstyle
Checkstyle is a static analysis tool that can check Java code against a set of style rules.
Here are some instructions on using Checkstyle for common project tasks.
Configuring Checkstyle
Checkstyle expects configuration files for checkstyle (e.g., files that specify which style rules to follow) to be in ./config/checkstyle/ by convention.
The two config files to add are:
config/checkstyle/checkstyle.xml: Contains the set of code style rules to follow.config/checkstyle/suppressions.xml: Contains which rules to suppress under in which files.
Checkstyle configuration matching our Java coding standard can be found in the AddressBook Level 3 project.
To suppress a rule for a segment of code, you can add in the comment //CHECKSTYLE.OFF: RuleName at the start of the code segment and //CHECKSTYLE.ON: RuleName at the end of the segment.
Using Checkstyle with Gradle
Prerequisite: The two config files checkstyle.xml and suppressions.xml are present (see the Configuring Checkstyle section above for more details on these two files).
Here is an example of relevant lines that should be in the build.gradle file.
plugins {
id 'checkstyle'
// other plugins
}
checkstyle {
toolVersion = '11.0.0'
}
Some relevant Gradle tasks added by the CheckStyle plugin.
checkstyleMain: checks if the main code complies with the style rulescheckstyleTest: checks if the test code complies with the style rules
For example, you can run gradlew checkstyleMain checkstyleTest to verify that all your code complies with the style rules.
Using Checkstyle-IDEA plugin
Prerequisite: The two config files checkstyle.xml and suppressions.xml are present (see the Configuring Checkstyle section above for more details on these two files).
Given below are the steps to install the Checkstyle-IDEA plugin so that Intellij can alert you about code style problems as you write code.
Install the Checkstyle-IDEA plugin as follows:
File>Settings(Windows/Linux), orIntelliJ IDEA>Settings…(macOS)- Select
Plugins(on the left slide menu in the dialog that pops up) - Select
Marketplace(on to top center of the same dialog box) - Find the plugin.
- Restart the IDE to complete the installation.
Click
File>Settings(Windows/Linux), orIntelliJ IDEA>Settings…(macOS)Click
Tools>CheckstyleSet
Scan ScopetoOnly Java sources (including tests), so that the plugin will run checkstyle for our test source codes as wellEnsure that the
Checkstyle versionis set to the one used by the project.
If your project uses Gradle, you can check thebuild.gradlefile to find the correct version.

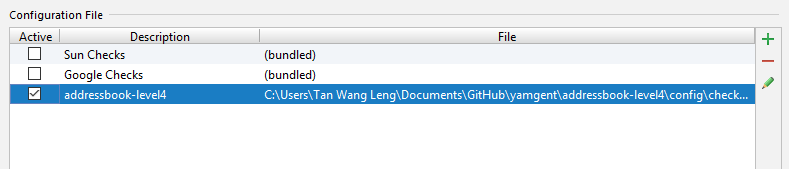
Click the
+sign underConfiguration FileEnter an arbitrary description e.g. addressbook
Select
Use a local Checkstyle fileUse the checkstyle configuration file found at
config/checkstyle/checkstyle.xmlClick
Next>FinishMark
Activefor the newly imported check configuration
Click
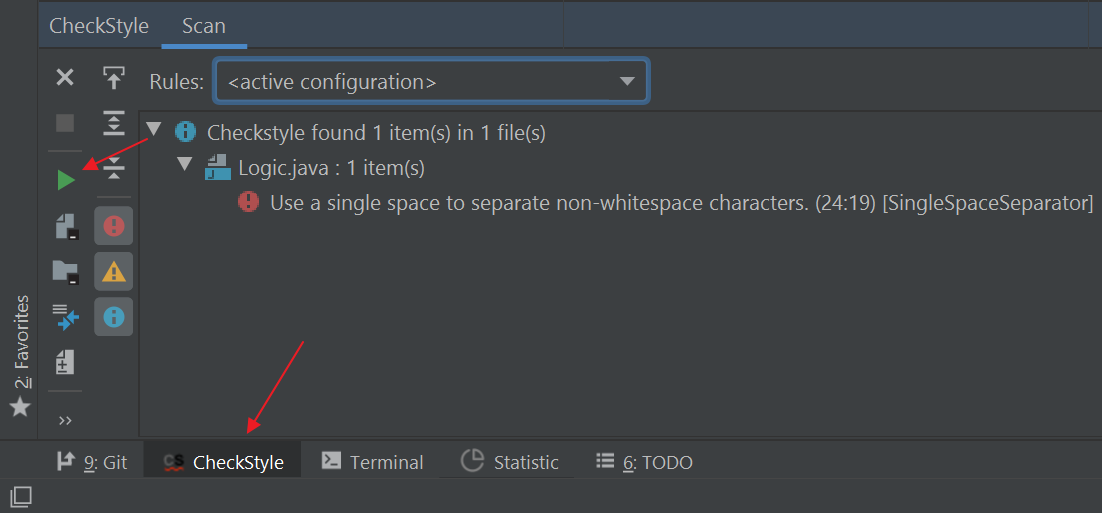
OKTo verify the plugin is set up correctly, temporarily modify the code to violate a style rule (e.g., add an extra line break before an
{) and run the Checkstyle check using the plugin.
Troubleshooting
Problem: When importing checkstyle.xml, Checkstyle-IDEA plugin complains that The Checkstyle rules file could not be parsed. … The file has been blacklisted for 60s.
- Reason:
checkstyle.xmlis written for a particular version, but the plugin was not configured to the correct version. - Solution: Ensure that you have selected the correct
Checkstyle versionthat matches the version inbuild.gradleand have clickedApply, ascheckstyle.xmlis written for Gradle’s checkstyle.
Problem: After setting up checkstyle.xml, Checkstyle-IDEA plugin does not seem to highlight the errors / real-time scanning seems broken.
- Reason: The plugin may not immediately run after setting it up.
- Solution: Restart the IDE.