Guides for SE student projects »
Intellij IDEA: Configuring the JDK
Ensure you have installed a suitable , as explained in our Java Installation Guides.
Install IntelliJ IDEA: You can get it from here. Either the Community Edition (free) or the Ultimate Edition (free for students) will do.
Configure the JDK.
Note: step (b) is needed only if your project is using Gradle (i.e., if there is a build.gradle file in the project root folder).
(a) Confirm the project JDK is set to the one you are supposed to use for the project, as explained here.
(b) Confirm the correct JVM is used for Gradle, as given in the panel below:
Intellij: Setting the JVM for Gradle
Go to File -> Settings and ensure the Gradle JVM is set as Project SDK ..., so that Gradle will use the same JDK used by the project.
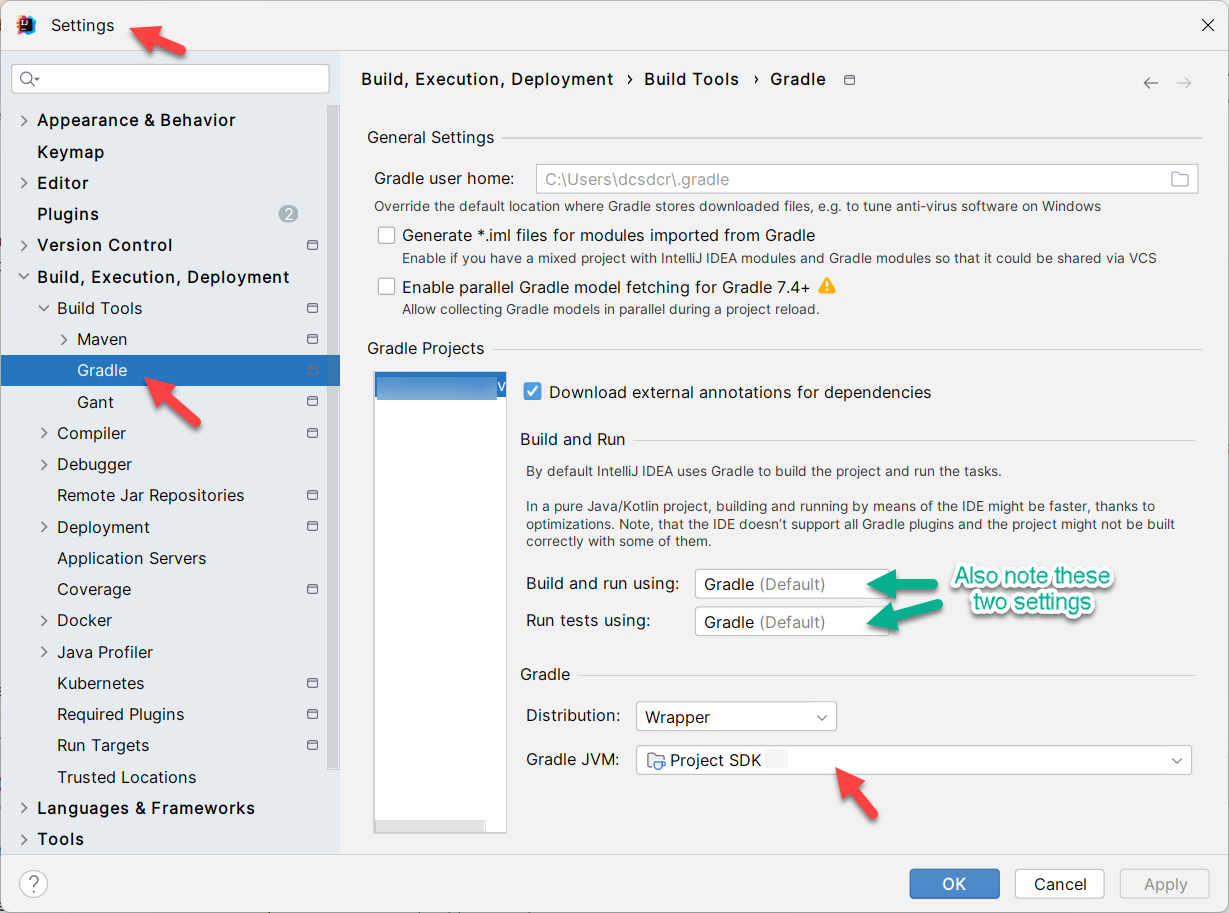
Also take note of the Build and run using: and Run tests using: settings. They are useful if you want to control whether you want Intellij to use Gradle to build/run/test your project.
- Create your first project.
A slightly more detailed explanation (from CodeLaunch) with some additional info at the end.