Guides for SE student projects »
JavaFX tutorial part 2 - Creating a GUI for Duke
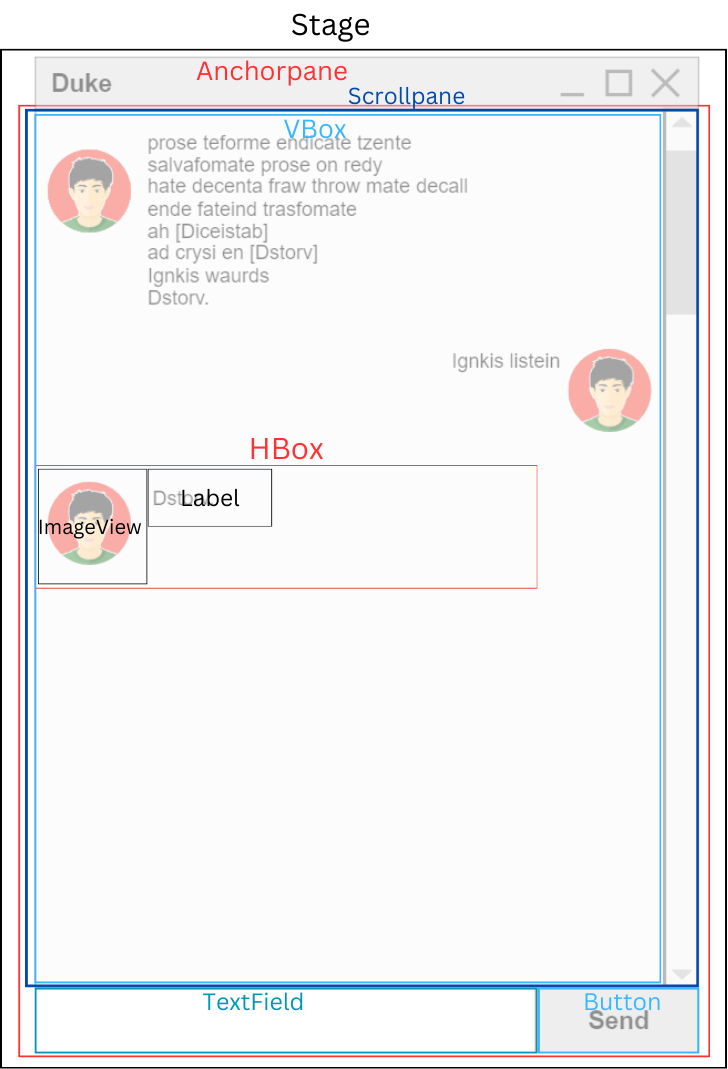
In this part of the tutorial, we will be creating a GUI for Duke from scratch based on the following mockup.
JavaFX controls
Controls are reusable UI elements. Refer to the JavaFX's official documentation for a list of controls available. From the mockup above, can you identify the controls that we will need to use? Here they are:
| Mockup | Control |
|---|---|
 | ImageView |
 | Label |
 | Button |
 | TextField |
 | ScrollPane |
You may be wondering why a ScrollPane is a Control and not a Pane, as its name suggests. ScrollPane extends the Control class in JavaFX because it represents a UI "widget" that the user directly interacts with (such as Label, Button, and TextField), whereas a Pane is a mere container that holds other components. Of course, a ScrollPane has the functionality of a container, allowing it to show a of its content. ScrollPane contains one node, whereas a Pane can contain multiple nodes.
Designing the Layout
Now that we know what controls we need to implement our UI, let’s start programming! We quickly run into a problem: how do we show all of them on the screen at once?
Each scene is initialized with a root Node. In part 1 of the tutorial, our root Node was a Label.
What happens when we need to display more than one Node on the Scene? For that, we need to understand the JavaFX hierarchy. Recall from part 1:
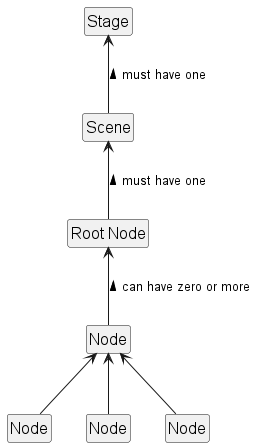
From the diagram, you see that the root Node can contain many other Nodes and similarly, each of those Nodes can contain many other Nodes. This means that if we can find a container to set as our root Node, we can place all our other Nodes in it.
But how do we get the exact layout we want in the UI? JavaFX provides that functionality in the form of layout panes in javafx.scene.layouts. Each layout pane follows a layout policy to decide how to arrange its children. For example, the VBox lays out its children in a single vertical column and its counterpart, the HBox lays out its children in a single horizontal row.
See the official documentation for a comprehensive list of layouts and how they behave.
One way to obtain the layout in the mockup is as follows:
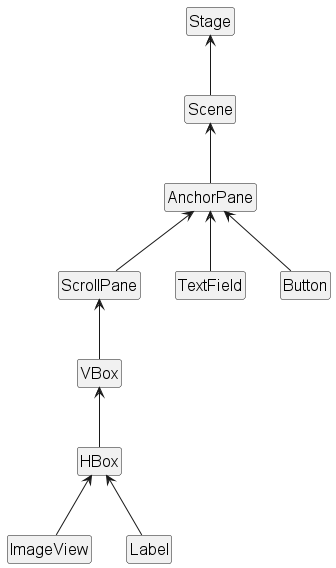
This structure, when reflected on the actual Mockup UI, is as follows:
To get that layout, we create a new AnchorPane and add our controls to it. Similarly, we create a new VBox to hold the contents of the ScrollPane. The code should look something like this:
import javafx.application.Application;
import javafx.scene.Scene;
import javafx.scene.control.Button;
import javafx.scene.control.ScrollPane;
import javafx.scene.control.TextField;
import javafx.scene.layout.AnchorPane;
import javafx.scene.layout.VBox;
import javafx.stage.Stage;
public class Main extends Application {
private ScrollPane scrollPane;
private VBox dialogContainer;
private TextField userInput;
private Button sendButton;
private Scene scene;
@Override
public void start(Stage stage) {
//Setting up required components
scrollPane = new ScrollPane();
dialogContainer = new VBox();
scrollPane.setContent(dialogContainer);
userInput = new TextField();
sendButton = new Button("Send");
AnchorPane mainLayout = new AnchorPane();
mainLayout.getChildren().addAll(scrollPane, userInput, sendButton);
scene = new Scene(mainLayout);
stage.setScene(scene);
stage.show();
//More code to be added here later
}
}
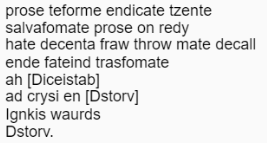
You might have noticed that the code above does not include code for the dialog boxes (i.e., chat messages) -- a dialog box is an HBox containing an ImageView and a Label, as shown in the mockup of the UI given below.

For groups of components that are reused multiple times like this, it is often beneficial to create our own custom control. Let’s create our custom control DialogBox with these two components:
import javafx.geometry.Pos;
import javafx.scene.control.Label;
import javafx.scene.image.Image;
import javafx.scene.image.ImageView;
import javafx.scene.layout.HBox;
public class DialogBox extends HBox {
private Label text;
private ImageView displayPicture;
public DialogBox(String s, Image i) {
text = new Label(s);
displayPicture = new ImageView(i);
this.getChildren().addAll(text, displayPicture);
}
}
We use this control just like any other control. To have a dialog box in the scene, we need to create a new DialogBox instance and pass two elements to it: a String and an Image. For now, we can do this in Main.java.
First, add two images to the main/resources/images folder.
For this tutorial, we have two images DaUser.png and DaDuke.png to represent the user avatar and Duke's avatar respectively, but you can use any image you want.
| Image | Filename |
|---|---|
 | DaUser.png |
 | DaDuke.png |
Then, create a sample DialogBox with a simple message.
import javafx.scene.image.Image;
public class Main extends Application {
// ...
private Image userImage = new Image(this.getClass().getResourceAsStream("/images/DaUser.png"));
private Image dukeImage = new Image(this.getClass().getResourceAsStream("/images/DaDuke.png"));
// ...
@Override
public void start(Stage stage) {
//...
sendButton = new Button("Send"); // existing code
DialogBox dialogBox = new DialogBox("Hello!", userImage);
dialogContainer.getChildren().addAll(dialogBox);
AnchorPane mainLayout = new AnchorPane(); // existing code
//...
}
}
Note the image location (e.g., /images/DaUser.png) is given relative to the main/resources folder and there is a / in front. Do the same for similar cases of using getResourceAsStream method in later parts of this tutorial.
Run the application and you should see something like this:
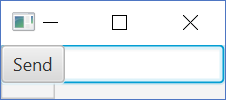
That is not what we were expecting, as the elements are not in the layout we wanted. Next, let's see how to fix that.
Styling the Controls
Almost every JavaFX object offers properties that you can set to customize its look and feel. For example, the Stage allows you to set its preferred size and title. Again, refer to the official JavaFX documentation for a comprehensive list of properties that you can modify. Here’s how you can get the application to look like the mockup:
Add the following code to the bottom of the start method. You'll have to add import javafx.scene.layout.Region; to the imports too:
import javafx.scene.layout.Region;
// ...
@Override
public void start(Stage stage) {
//Setting up required components
//...
//Formatting the window to look as expected
stage.setTitle("Duke");
stage.setResizable(false);
stage.setMinHeight(600.0);
stage.setMinWidth(400.0);
mainLayout.setPrefSize(400.0, 600.0);
scrollPane.setPrefSize(385, 535);
scrollPane.setHbarPolicy(ScrollPane.ScrollBarPolicy.NEVER);
scrollPane.setVbarPolicy(ScrollPane.ScrollBarPolicy.ALWAYS);
scrollPane.setVvalue(1.0);
scrollPane.setFitToWidth(true);
dialogContainer.setPrefHeight(Region.USE_COMPUTED_SIZE);
userInput.setPrefWidth(325.0);
sendButton.setPrefWidth(55.0);
AnchorPane.setTopAnchor(scrollPane, 1.0);
AnchorPane.setBottomAnchor(sendButton, 1.0);
AnchorPane.setRightAnchor(sendButton, 1.0);
AnchorPane.setLeftAnchor(userInput, 1.0);
AnchorPane.setBottomAnchor(userInput, 1.0);
//More code to be added here later
}
Style the DialogBox too:
public DialogBox(String s, Image i) {
text = new Label(s);
displayPicture = new ImageView(i);
//Styling the dialog box
text.setWrapText(true);
displayPicture.setFitWidth(100.0);
displayPicture.setFitHeight(100.0);
this.setAlignment(Pos.TOP_RIGHT);
this.getChildren().addAll(text, displayPicture);
}
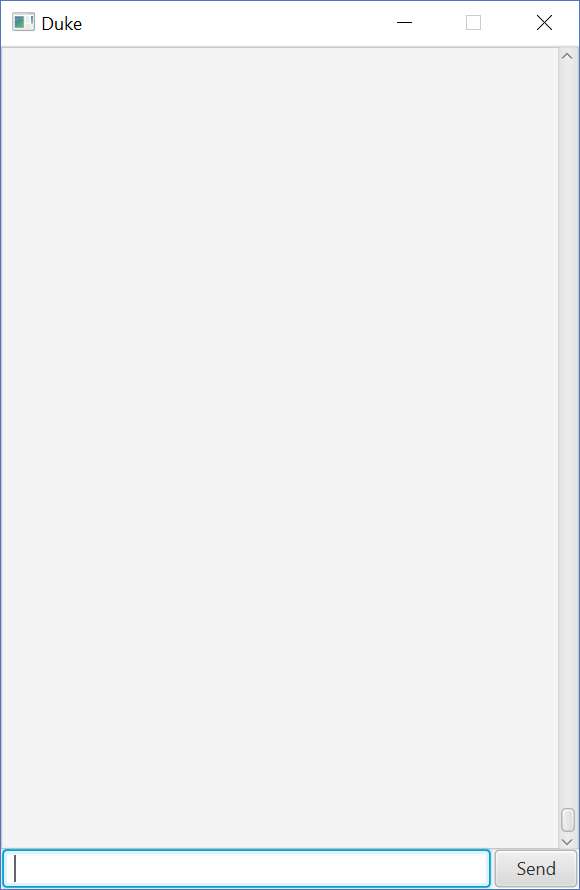
Run the application again. It should now look like this:
Previous | ToC | What's next? JavaFX tutorial part 3 - Interacting with the user
Authors:
- Initial Version: Jeffry Lum