Guides for SE student projects »
Gradle tutorial
Gradle is a build automation tool used to automate build processes, and it can help with managing external dependencies as well (e.g., third-party libraries).
Basics
You use a build file (named build.gradle) to describe how Gradle should behave for a project, using the following three mechanisms.
Plugins extend the functionality of Gradle. For example, the
javaplugin adds support forJavaprojects.Tasks are reusable blocks of logic. For example, the task
cleansimply deletes the project build directory. Tasks can be composed of, or dependent on, other tasks.Properties change the behavior of tasks. For instance, when using the
applicationplugin, we should use themainClassName(ormainClass) property to tell Gradle which class is the entry point to your application. As Gradle favors convention over configuration, there is not much you need to configure if you follow the recommended directory structure.
Even if you are not using Intellij, a quick watch of the following video is strongly recommended before proceeding with the rest of this tutorial, if you are new to Gradle. The video will help you grasp how Gradle fits into the big picture of a project, and what it looks like to use it.
Adding Gradle to the project
There are several ways of integrating Gradle into a project. This tutorial uses the Gradle wrapper approach. Given below are three scenarios of adding the Gradle wrapper to a project. Choose the one that fits your situation best.
Scenario 1: You are setting up a project that already has Gradle wrapper files.
If the project comes with Gradle support, you will see a build.gradle file in your project root.
IntelliJ IDEA has the Gradle plugin installed by default. If you have disabled it, go to File → Settings → Plugins to re-enable it.
If your project involves GUI programming, similarly ensure the JavaFX plugin has not been disabled.
- Open Intellij.
- If you are in the welcome screen, Click
Open. Otherwise, clickFile->Open.
i. Select the project directory, and clickOK.
ii. If there are any further prompts, accept the defaults but do ensure that the selected version ofGradle JVMmatches the JDK being used for the project. - Confirm the correct Java version is being used for Gradle, as follows:
(a) Confirm the project JDK is set to the one you are supposed to use for the project, as explained here.
(b) Confirm the correct JVM is used for Gradle, as given in the panel below:
Intellij: Setting the JVM for Gradle
Go to File -> Settings and ensure the Gradle JVM is set as Project SDK ..., so that Gradle will use the same JDK used by the project.
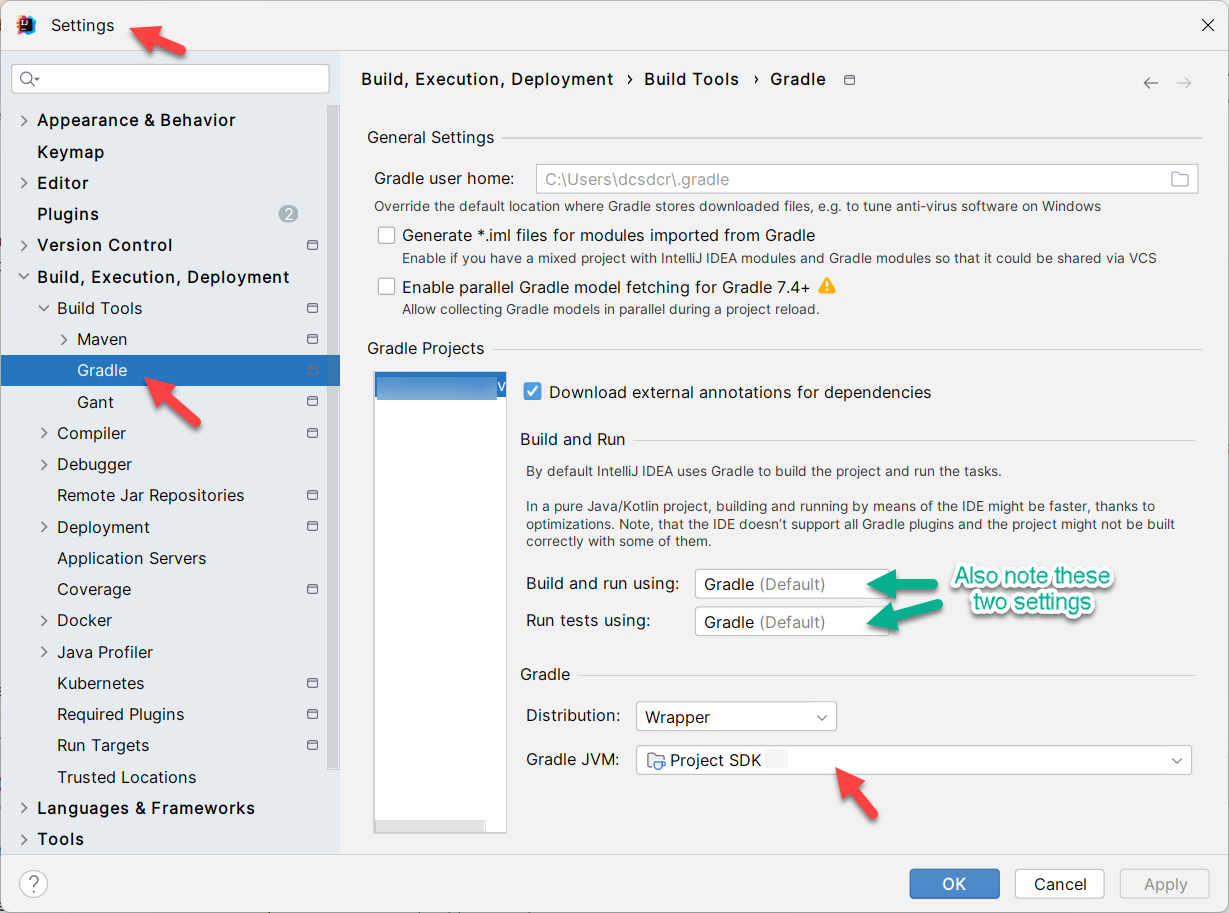
Also take note of the Build and run using: and Run tests using: settings. They are useful if you want to control whether you want Intellij to use Gradle to build/run/test your project.
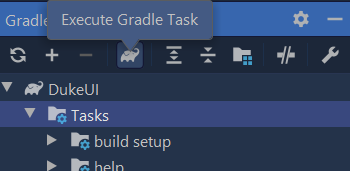
- After the importing of the project is complete (which could take a few minutes), you will see the
Gradle Toolbarin the IDEA interface e.g., look for the elephant icon (on Windows, this appears on the right-edge of the IDE window) and click it.
You can refer to the guide VS Code - Importing a Gradle project.
Run the java -version command in the same terminal you use for running Gradle commands, to ensure you are using the intended Java version for Gradle.
No further action required. You should be able to use Gradle via the command line right away.
Scenario 2: You are adding Gradle support to an ongoing project. Gradle wrapper files are available but have not been added to the project yet.
First, add the Gradle wrapper files to the project. e.g., if they are in a separate branch, merge that branch.
- Close the IDEA project if it is open.
- Delete the
.ideafolder.
Note that some operating systems hide folders/files starting with.by default. If you can't see the.ideafolder, you might need to configure the OS to 'un-hide' those files/folders. - Open/import the project again, as explained in scenario 1 above.
You can refer to the guide VS Code - Importing a Gradle project.
No further actions required. You should be able to use Gradle via the command line now.
Scenario 3: You are adding Gradle support to an ongoing project from scratch.
- This is a good place to start.
Running Gradle tasks
There are several ways to run a Gradle task in Intellij. Examples:
- Locate the task in the Gradle toolbar, and double-click it.
- Hit
Ctrlkey twice (to bring up the command runner), and typegradlewfollowed by tasks to run e.g.,gradlew clean test.
See this video for more ways to run Gradle tasks inside Intellij.
Alternatively, you can run Gradle tasks using the command line (even if you are using Intellij). Follow the instructions in the Using the terminal tab above.
If the Gradle tasks don't appear in the Gradle window, click the 'refresh' button in the toolbar to reimport the Gradle project.
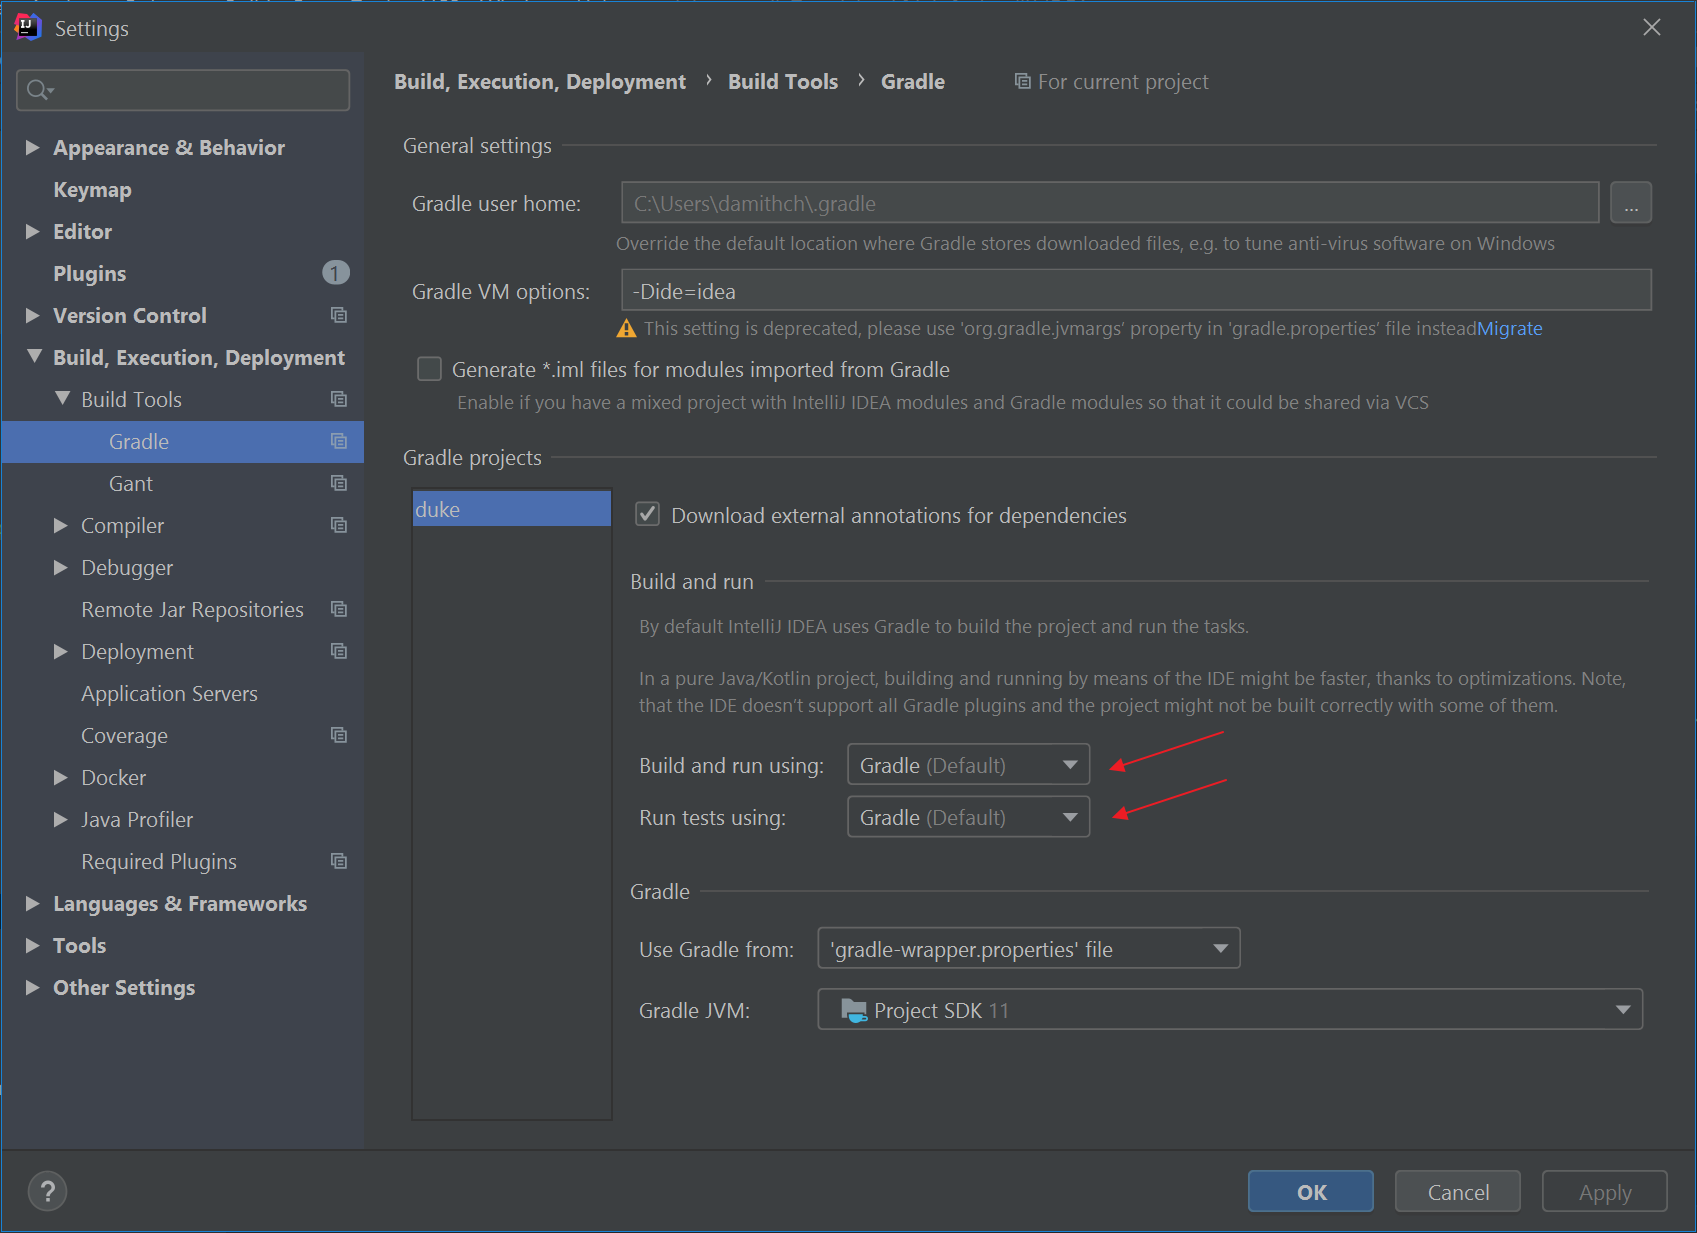
Intellij uses Gradle to run your application by default. If you would like to run the project in the normal way, go to File > Settings and change the following settings:
Expand to see screenshot ...
You can open a terminal, navigate to the project root, and type the following command in the terminal.
- On Windows:
gradlew <task1> <task2> …e.g.gradlew clean test - On Mac/Linux:
./gradlew <task1> <task2> …e.g../gradlew clean test
Managing plugins and dependencies
Gradle functionality can be extended using plugins. Here are some plugins commonly used in Java projects.
More info on specific plugins:
- Java -- a built-in plugin that adds Java compilation along with testing and bundling capabilities to a project.
Application -- a built-in plugin for creating an executable JVM application. - Checkstyle -- a built-in plugin for using Checkstyle in a project.
- Shadow -- a third-party plugin for creating fat/uber JARs.
The relevant lines for adding the above plugins to the build.gradle are given below:
plugins {
id 'java'
id 'application'
id 'checkstyle'
id 'com.github.johnrengelman.shadow' version '7.1.2'
}
You can follow the links in the list above to find what tasks are provided by a plugin and how to configure it. For example, run is a task provided by the Application plugin, and you can set the mainClassName (mainClass in some versions) property to indicate which class should be used as the entry point of the application:
application {
mainClass.set("seedu.duke.Main")
}
Gradle can automate the management of dependencies to third-party libraries too. You just need to add the dependency into the build.gradle file and Gradle will do the rest. For example, to add the Natty (a third-party library used for parsing natural language dates e.g., today), you simply have to add the following line to the dependencies section of the build.gradle file.
implementation group: 'com.joestelmach', name: 'natty', version: '0.13'
Tip: Most third-party libraries specify how to add it as a Gradle dependency (example).
From where does Gradle download dependencies? The public servers Gradle will search to find the specified dependencies are listed in the build.gradle file. e.g.,
repositories {
mavenCentral()
maven { url 'https://oss.sonatype.org/content/repositories/snapshots/' }
}
After updating the build.gradle file,
- if you are using an IDE: Use the IDE UI to reload dependencies based on the updated file. For example, if using Intellij IDEA, you can click the
 icon in the Gradle tool window to reload the file.
For good measure, you can restart the IDE too. - if not using an IDE: Run
./gradlew clean buildto rebuild everything based on the updated file.
Using Gradle to do some common project activities
Running the application
Run the run task to launch the main class of the application.
e.g. ./gradlew run
Cleaning the project
Run the clean task to delete the files created during the previous build tasks (e.g. files in the build folder).
e.g. ./gradlew clean
You can use clean to prevent Gradle from skipping tasks: When running a Gradle task, Gradle will try to figure out if the task needs running at all. If Gradle determines that the output of the task will be the same as the previous time, it will not run the task. For example, it will not build the JAR file again if the relevant source files have not changed since the last time the JAR file was built. If you want to force Gradle to run a task, you can combine that task with clean (e.g., ./gradlew clean shadowJar). Once the build files have been clean ed, Gradle has no way to determine if the output will be same as before, and it will have no choice but to execute the task.
Running Checkstyle
tasks checkstyleMain and checkstyleTest check if the main code and test code complies with the Checkstyle rules, respectively.
e.g., ./gradlew checkstyleMain checkstyleTest
See our Checkstyle Tutorial for more details.
Running tests
Run the test to run all tests and test-related tasks.
e.g. ./gradlew test
See our JUnit tutorial to find how to use JUnit with Gradle.
Creating JAR files
Run the shadowJar task to create a fat JAR file of the application.
e.g. ./gradlew clean shadowJar
See our JAR tutorial to find more about creating JAR files using Gradle.
Compiling
There is no need to run these Gradle tasks manually as they are called automatically by other relevant Gradle tasks.
compileJava: Checks whether the project has the required dependencies to compile and run the main program, and downloads any missing dependencies before compiling the classes.compileTestJava: Checks whether the project has the required dependencies to perform testing, and download any missing dependencies before compiling the test classes.
Enabling assertions
To enable assertions when executing Java code, add the following to the build.gradle file.
run {
enableAssertions = true
}
Resources
Authors:
- Initial Version: Jeffry Lum