Guides for SE student projects »
Using JUnit
JUnit is a testing framework for Java.
As JUnit is a third-party library, you need to add support for it in your project. Here is how you can do that using . While it is possible to add JUnit to your project without Gradle, we strongly recommend using Gradle as it can make things easier in the long run.
If you have not done that yet, follow the Gradle Tutorial to add Gradle support to the project first.
This tutorial explains how to use JUnit in a project, with Gradle.
Conventions to Follow
Here are the conventions to follow, when using JUnit in a Gradle project:
- Add test code in a folder named
[project root]\src\test\java\folder. - Name the test class to match the class being tested (
Todo.javacan be tested byTodoTest.java), and put it in a package to match (reason: if packages are matched, the test class can access package-private members of the target class).
For example,- Class being tested
seedu.duke.Todo:src\main\java\seedu\duke\Todo.java - Test class
seedu.duke.TodoTest:src\test\java\seedu\duke\TodoTest.java
- Class being tested
Configuring Gradle for JUnit
Update the build.gradle file to include JUnit as a dependency. Here are the relevant lines that needs to be in the build.gradle (change the version number as necessary):
First, ensure the Java plugin is included:
plugins {
id 'java'
}
Next add the following JUnit dependencies to the dependencies block, to tell which JUnit libraries to be used:
dependencies {
testImplementation group: 'org.junit.jupiter', name: 'junit-jupiter-api', version: '5.10.0'
testRuntimeOnly group: 'org.junit.jupiter', name: 'junit-jupiter-engine', version: '5.10.0'
}
Finally, tell Gradle that JUnit is to be used as the testing tool (and to configure a few aspects of how Gradle handles JUnit tests), as follows:
test {
useJUnitPlatform()
testLogging {
events "passed", "skipped", "failed"
showExceptions true
exceptionFormat "full"
showCauses true
showStackTraces true
showStandardStreams = false
}
}
If using an IDE, restart the IDE after updating the build.gradle file.
Writing the First JUnit Test
Add a test class, while following the conventions given earlier in this page. If you don't follow those conventions, Gradle will not be able to find your test class. For example, if you have a class src\main\java\seedu\duke\Todo.java, you can add a test class src\test\java\seedu\duke\TodoTest.java. Here's some sample code:
package seedu.duke; //same package as the class being tested
import org.junit.jupiter.api.Test;
import static org.junit.jupiter.api.Assertions.assertEquals;
public class DukeTest {
@Test
public void dummyTest(){
assertEquals(2, 2);
}
@Test
public void anotherDummyTest(){
assertEquals(4, 4);
}
}
Run tests, either using the Intellij UI (preferred -- this makes debugging failed test cases easier) or using Gradle itself, as explained in the section below.
Running Tests
In Intellij IDEA:
- To run a specific JUnit test class (e.g.,
src/test/java/seedu/DukeTest.java), right-click on the test class, and chooseRun {classname}.
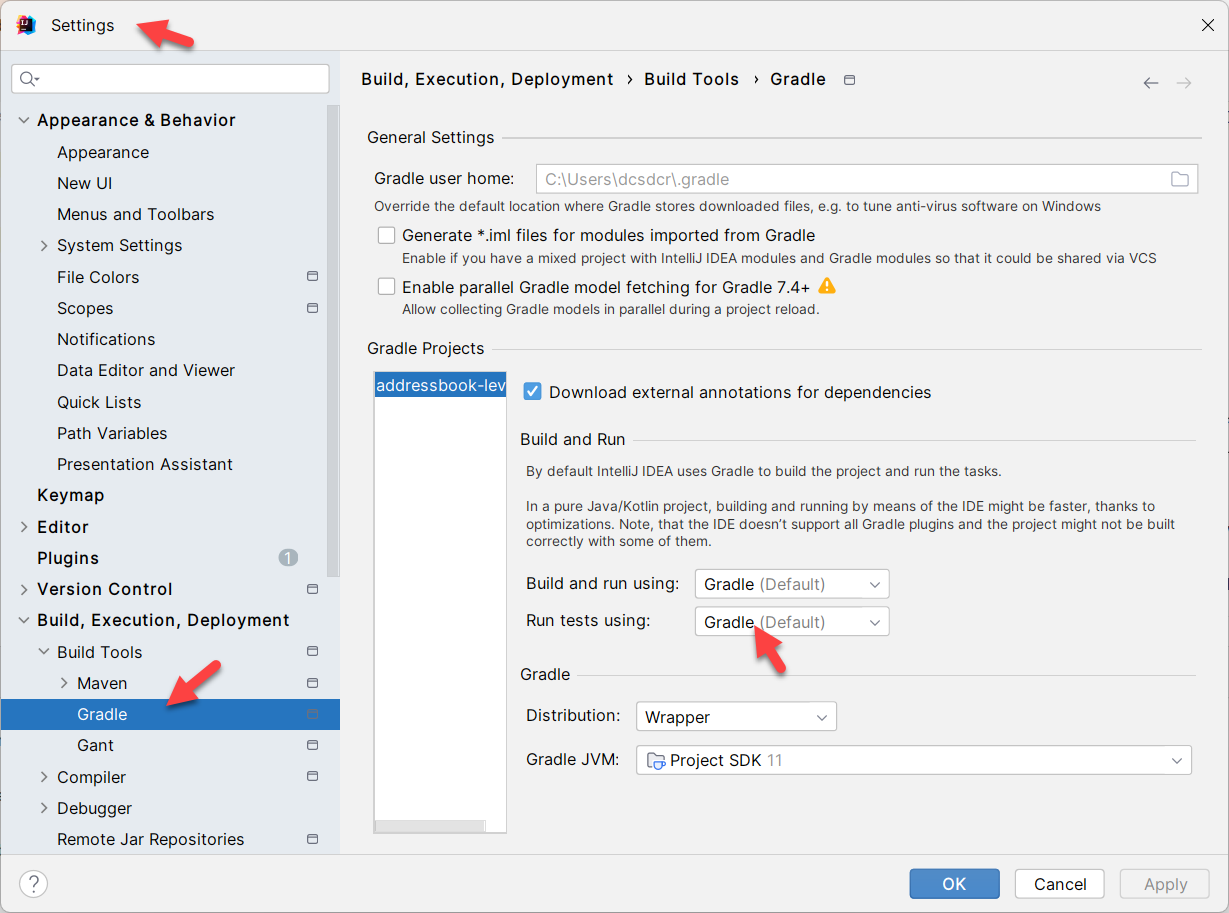
If the above doesn't work, you may want to go to File > Settings and change theRun tests using: setting to Intellij IDEA (instead of Gradle), as shown below:
Expand to see screenshot ...
- To run all tests in a folder (e.g.,
src/test/javafolder), right-click on the folder, and chooseRun Tests in '...'. - Other supported IDEs (e.g., Eclipse, NetBeans, VS Code, etc.) have similar mechanisms.
Using Gradle:
- To run all tests in the project, run the Gradle task
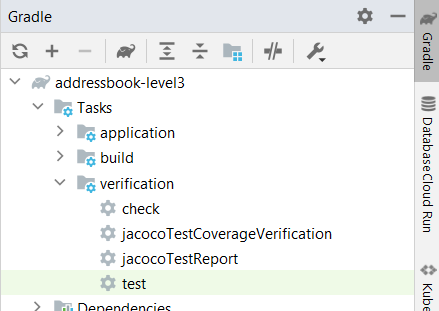
test(more info on running Gradle tasks) - [If using Intellij UI to run the
testtask] The location of thetesttask in the Gradle task hierarchy isTasks -> verification -> test(see screenshot below).
Other ways:
- There is also a way to run JUnit tests in the console (without Gradle or an IDE), which is not used as much as the above two methods.
Writing Useful JUnit Tests
After you are able to run JUnit tests successfully using a dummy test class such as the above, you can add more tests and test classes as necessary.
To learn how to write useful JUnit test cases, refer to this section of our SE book. For a quick overview of more advanced JUnit features, refer to this section.
Troubleshooting JUnit
- Problem: Tests fail with at
ClassNotFoundExceptionerror, although the supposedly-missing class is present.
Solution: Ensure the path of source and test files does not have Unicode characters (e.g., Chinese characters). Gradle sometimes fail to find files in a path that has Unicode characters.